Follow this blog

Customize in /user/extras/follow-sheet.tmpl.php.

Sample text.

Telegram, X or  Twitter, Facebook, VK, LinkedIn, Odnoklassniki, Pinterest, YouTube, TikTok, RSS JSON Feed

Sample text.

Dmitry Baramov

Boring Image Processing Blog

GitHub   About

Grid-Aligned Backdrops Script

I always work with the grid enabled in my settings and align all my nodes to it. This makes the script tidy and easy to read. The only thing that used to drive me crazy was that backdrop edges don’t snap to this grid. The center snaps perfectly, but the borders just hang awkwardly between the grid lines. So, I wrote a script to partially fix this mess.
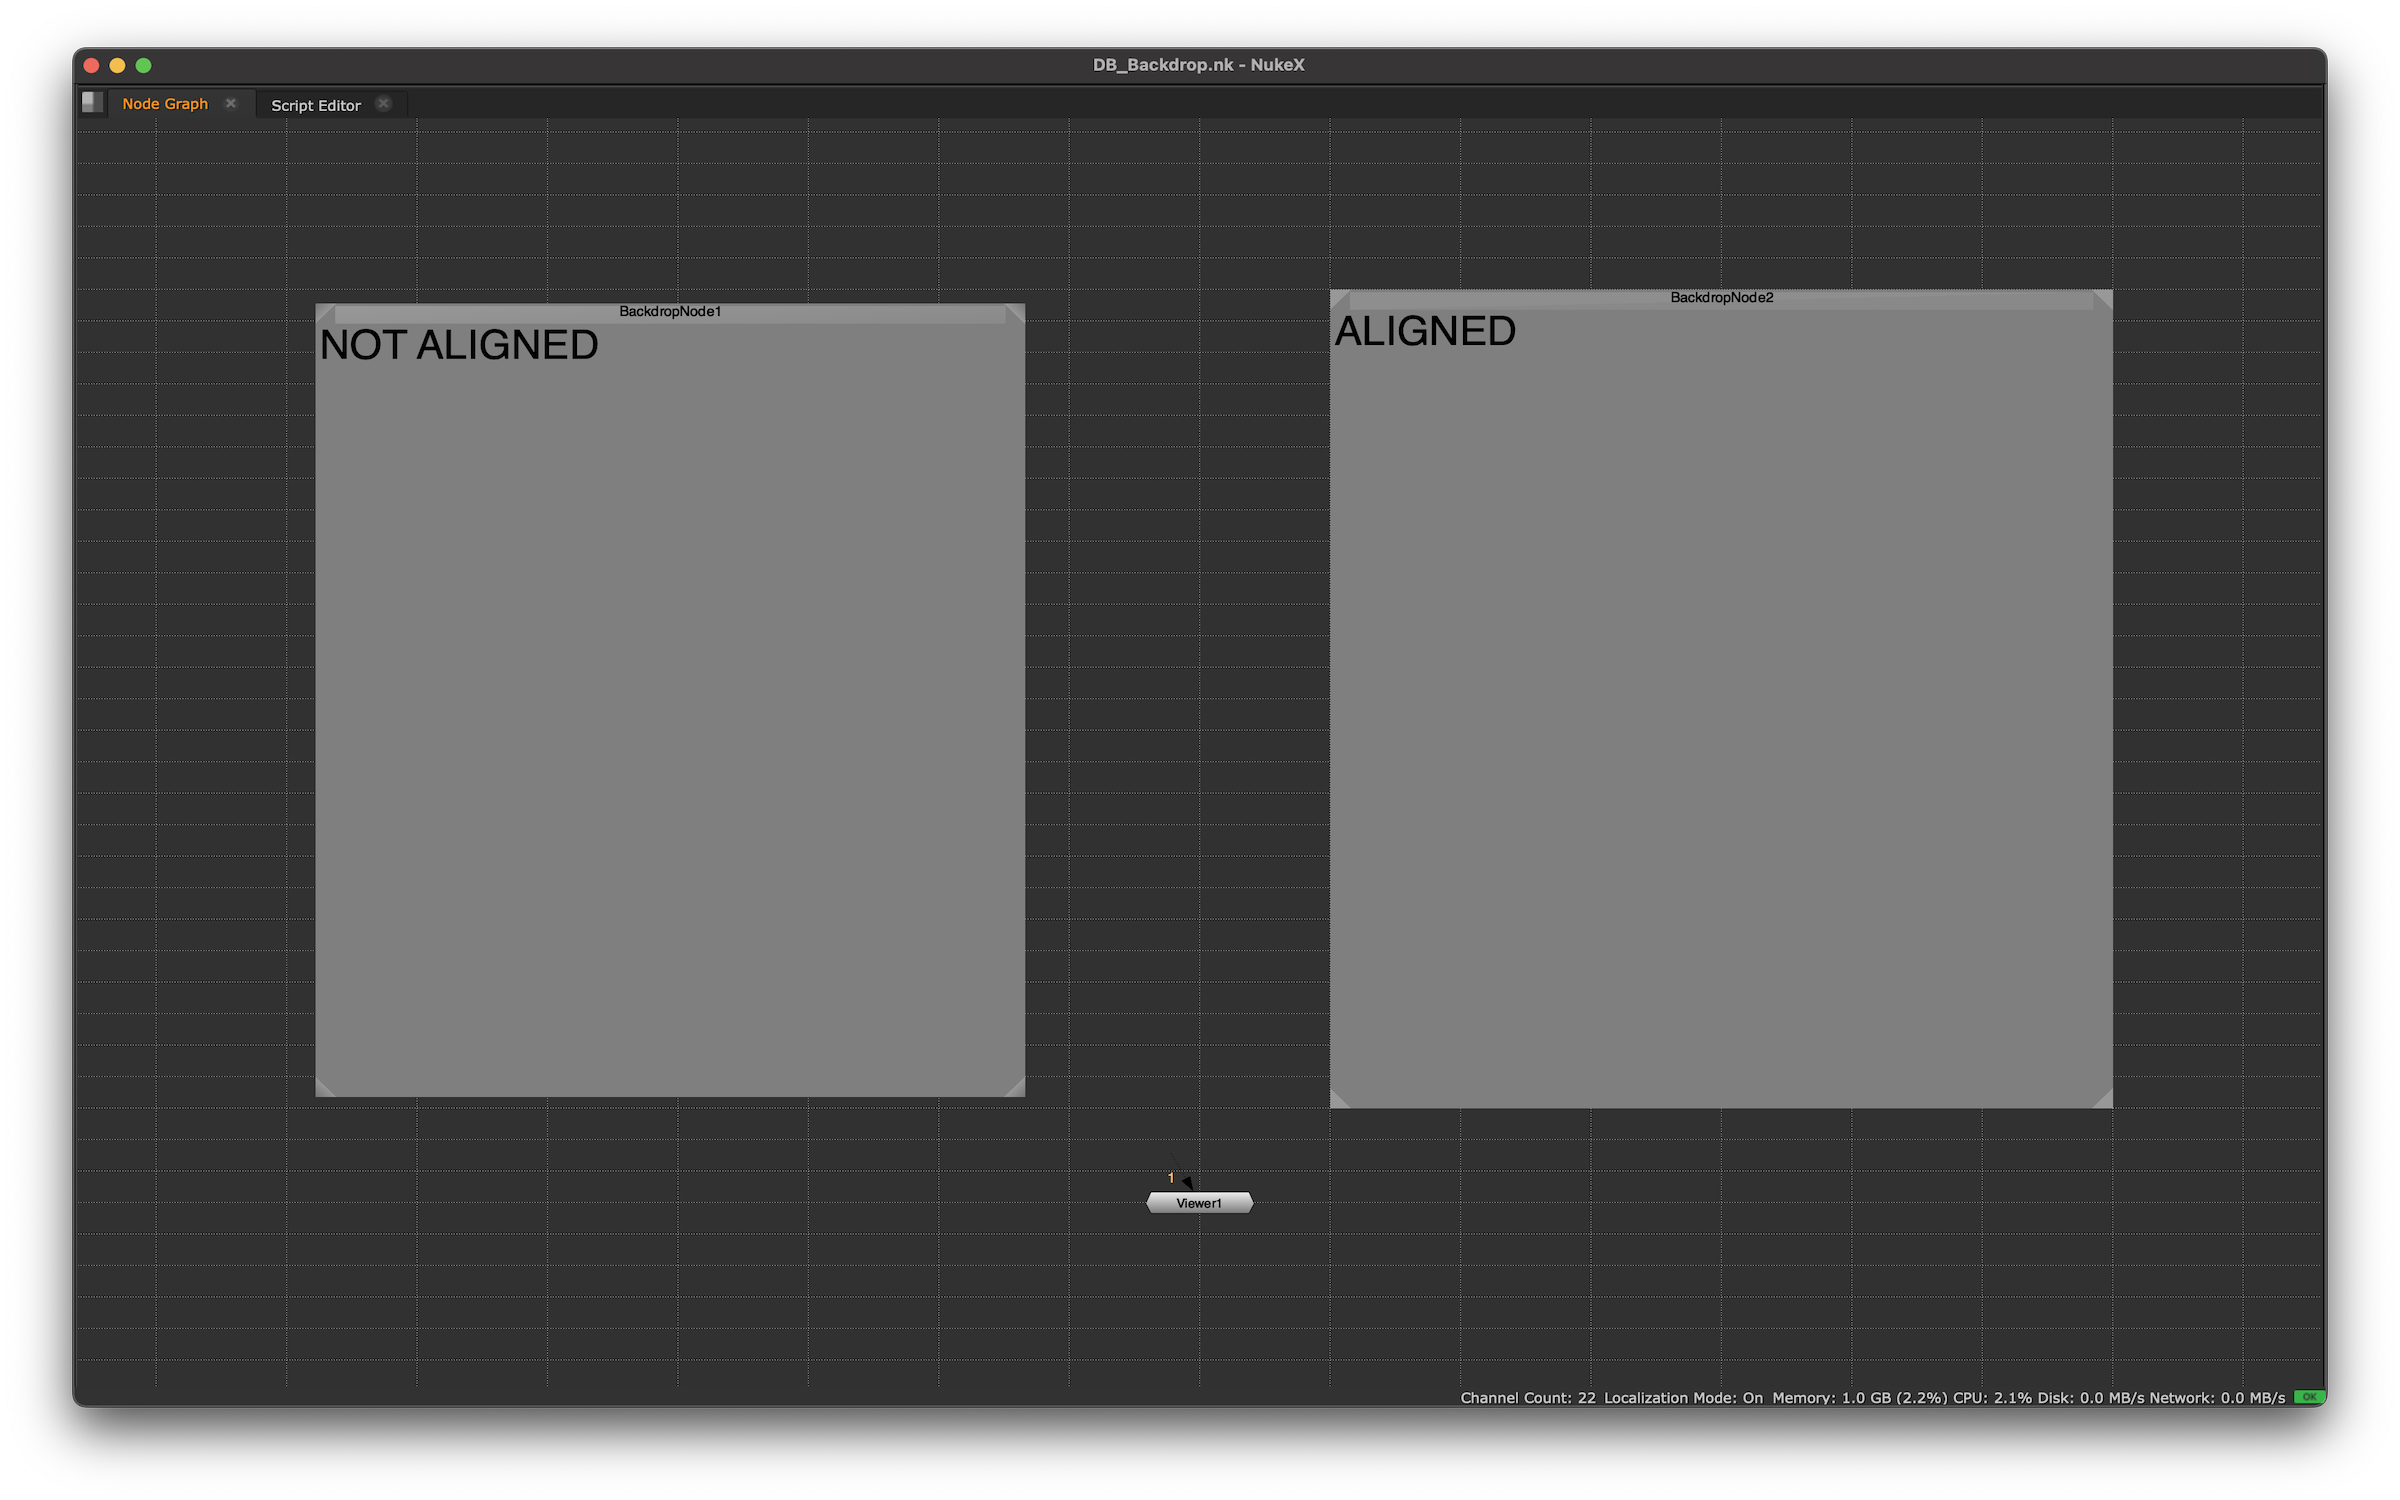
I increased the grid contrast here just for illustration purposes.

Once installed, a new menu item appears in the top menu: DB Tools/DB Backdrop, with two commands: Create new and Align to grid. The first one, surprisingly enough, creates a new backdrop around the selected nodes — or an empty one under your mouse cursor if nothing is selected. But unlike the default Nuke backdrop, its edges snap perfectly to the grid. The second command aligns one or more selected backdrops without affecting the nodes inside them. The borders are set strictly to even grid lines so that they don’t shift off the grid when you trigger Snap All to Grid.

The script pulls the grid size directly from the project settings. It also grabs the tile size to calculate proper padding when adding a backdrop around a group of nodes. The left and right paddings are identical, while the top padding is larger than the bottom one to leave room for the title.

By default, the hotkeys are set to Alt (Option) + B for a new backdrop and Alt (Option) + Shift + B to align existing ones. You can change them in included menu.py.

Download the script from my GitHub.
Disconnecting All Viewers on Script Load

This is a lifesaver of a hook. If a broken node completely freezes your script, Nuke won’t even finish loading it unless you disconnect the viewers first. This leaves you completely blind, unable to debug what’s causing the crash or fix the issue.

Drop this code into your main menu.py inside the .nuke folder:

def disconnectAllViewers():
    for node in nuke.allNodes('Viewer'):
        for i in range(node.inputs()):
            node.setInput(i, None)
            
nuke.addOnScriptLoad(disconnectAllViewers)

This function plugs directly into the addOnScriptLoad() callback. When triggered, it loops through every input of every Viewer node in the script and cuts the connection.

Adding a Slider to an Integer Knob

By default, an integer knob in Nuke is created without a slider. While this works fine, adding a slider definitely provides a better UX.

You can force a slider to appear using setFlag(). The problem, however, is that as soon as the node is re-initialized — like during a copy/paste or when reloading the script — the flag resets, and the slider vanishes.

The solution is to inject the flag configuration into the onCreate callback. It’s a bit of a hack, sure, but it gets the job done. Here is an example for an integer knob named smooth_strength:

set_slider = "nuke.thisNode()['smooth_strength'].setFlag(0x0000000000000002)"
nuke.selectedNode()['onCreate'].setValue(set_slider)

If needed, you can also define the range and default value right then and there:

set_slider = """
node = nuke.thisNode()
node['smooth_strength'].setFlag(0x0000000000000002)
node['smooth_strength'].setRange(1,50)
node['smooth_strength'].setDefaultValue([10])
"""
nuke.selectedNode()['onCreate'].setValue(set_slider.strip())

This will add a new line inside the node’s data. To see the result, you’ll need to re-initialize the node so the onCreate callback triggers — simply cutting and pasting the node will do the trick.

Shoutout to Attila Gasparetz, where I originally borrowed this clever solution from.

Why I Stopped Exporting Gizmos

Recently, I’ve stopped exporting gizmos altogether. Instead, I leave them as Groups and simply change the file extension from .nk to .gizmo. On top of that, I’m slowly converting my entire collection of third-party tools into Groups as well.

This approach has a ton of pros. First, you don’t have to hunt down and package custom tools when sharing a script, which is a massive lifesaver for anyone using relative paths who doesn’t want to mess around with archiving or asset collection. The internals are always exposed, allowing you to tweak something inside on the fly — and only within that specific instance, without breaking anything else. Most importantly, an old, working script won’t crash or break the look when the global gizmo gets updated to a newer version, especially when you’re in emergency mode right before a deadline.

The cons, naturally, stem from the pros. You can’t update or patch everything across all scripts in one fell swoop. A Group masquerading as a gizmo gets baked right into the .nk script and becomes part of it once added — though that’s not necessarily a bad thing. Heavy gizmos/groups will bloat your project file size. Plus, someone with clumsy fingers might dig too deep inside and break the whole setup.

On the flip side, what already works will continue to work predictably, and what doesn’t work will end up being replaced manually anyway, so the concept is highly viable. The only real thing you’ll need to keep a close eye on is version control.

CopyCat Dataset Tool

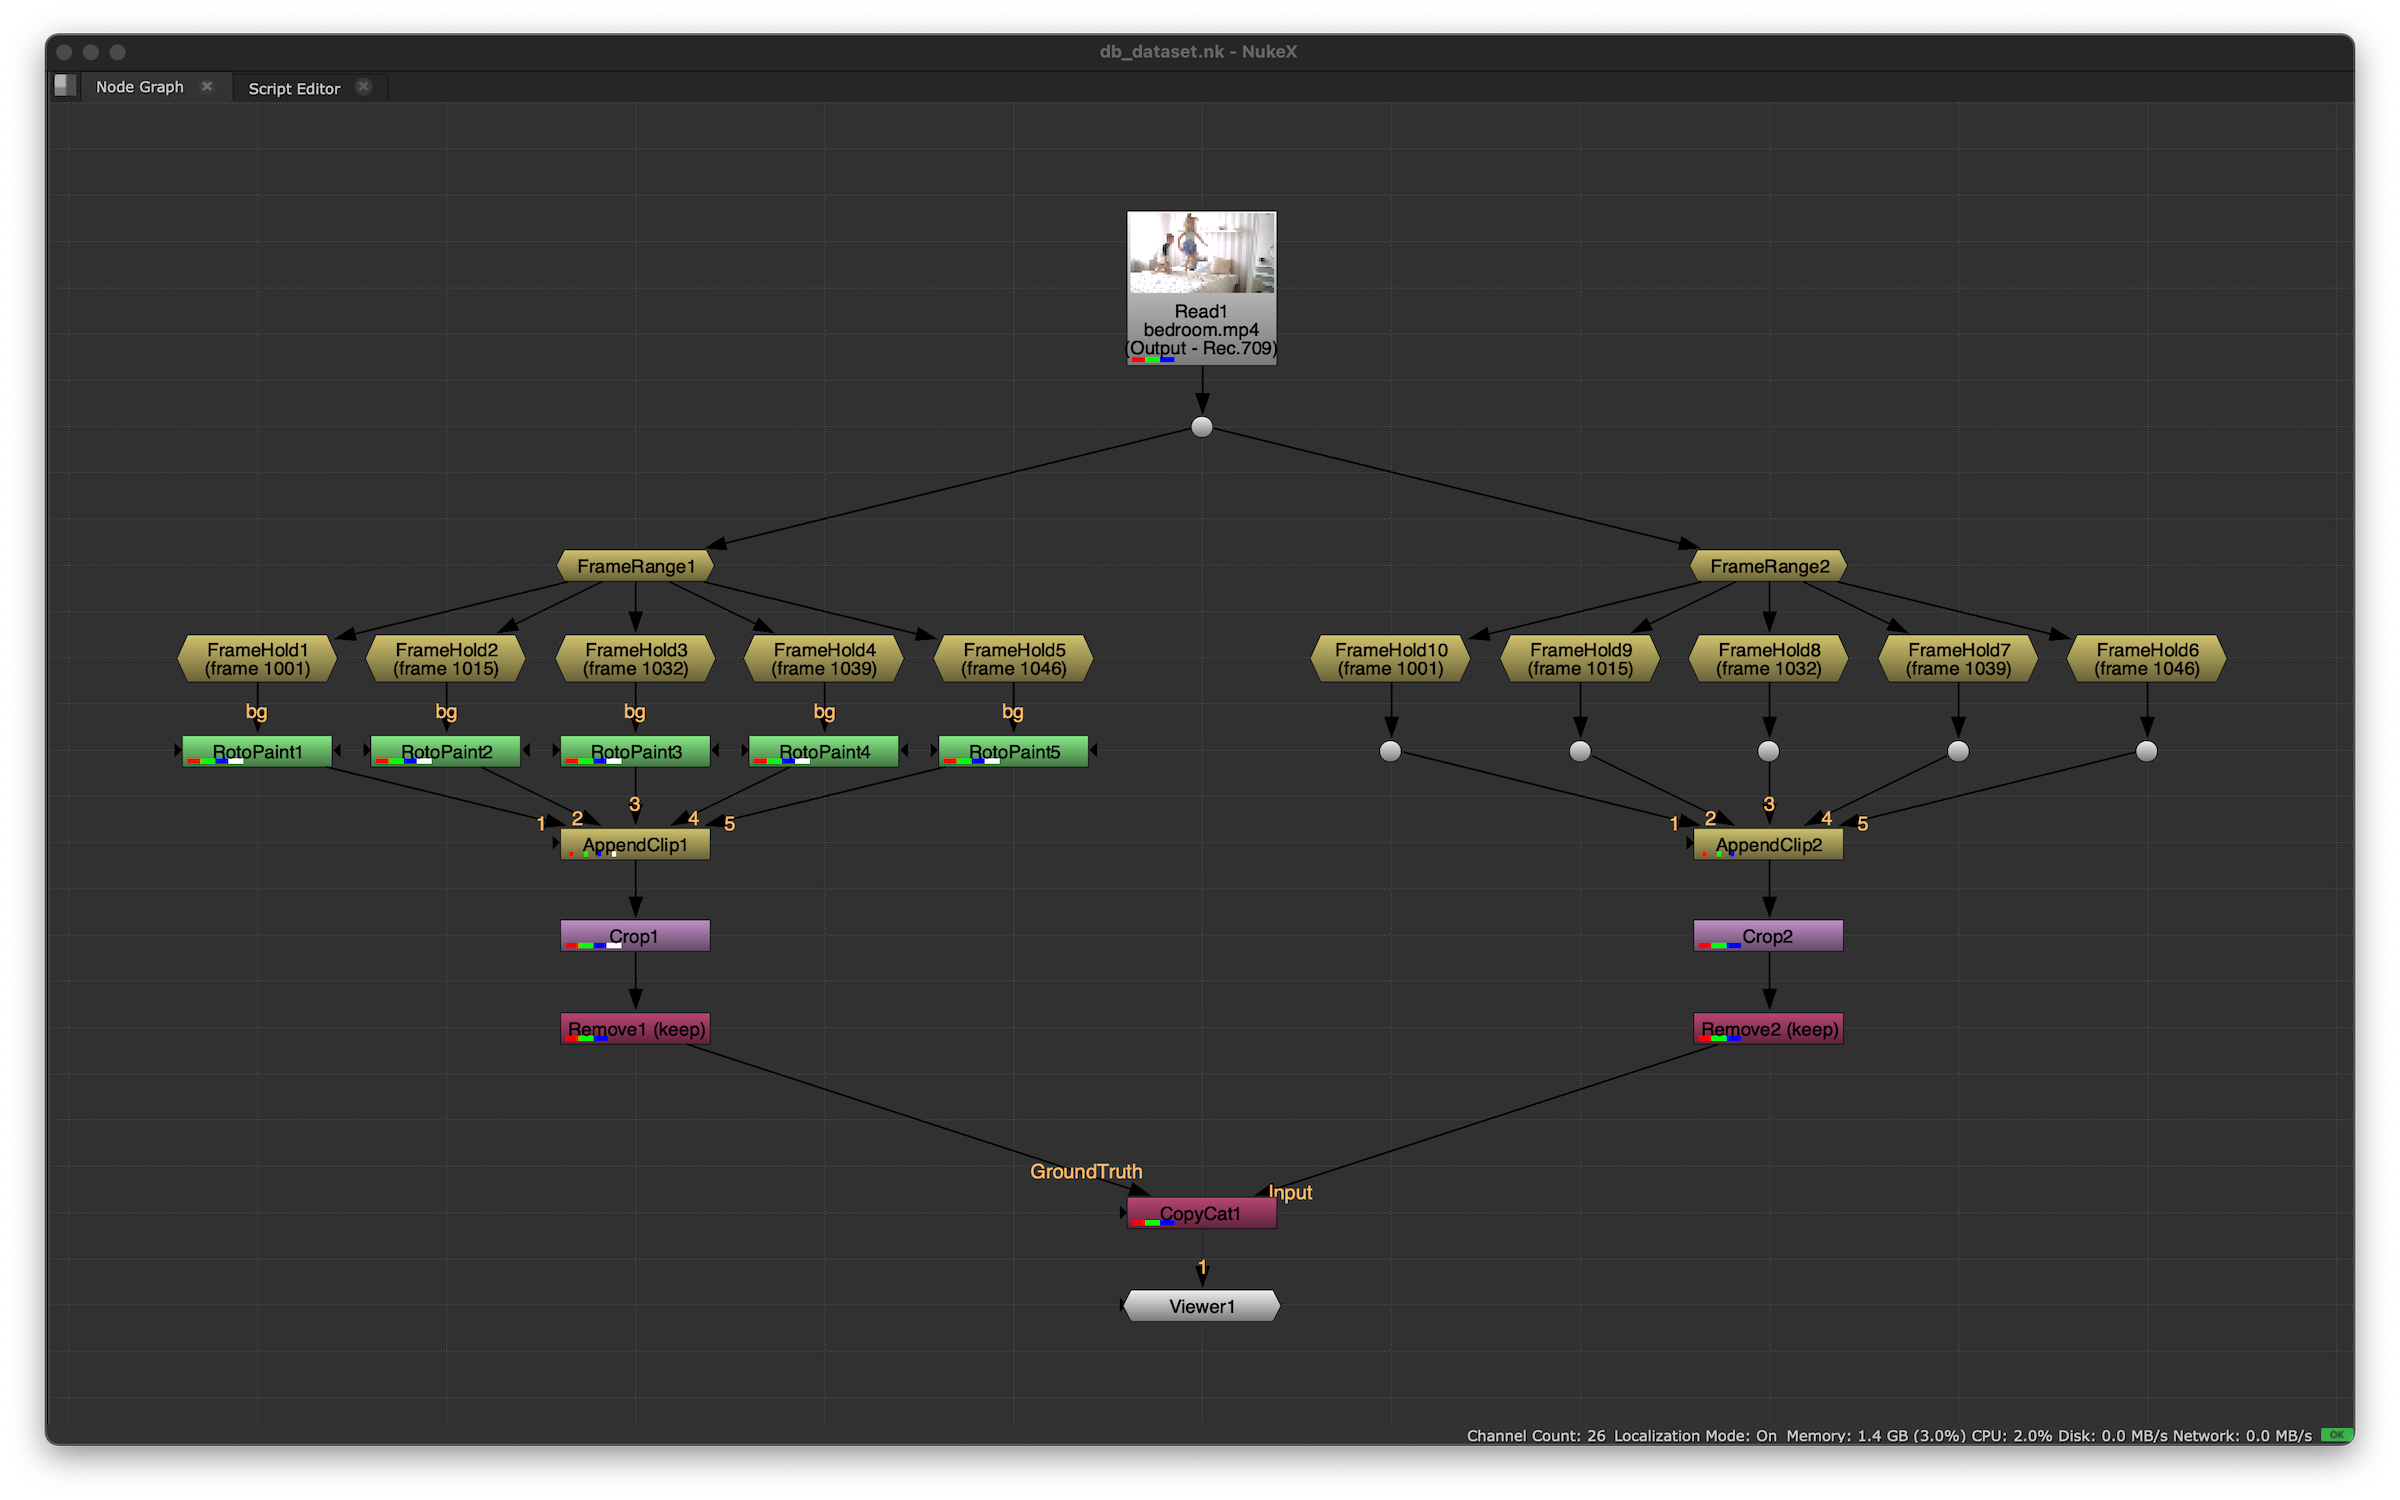
Here’s what you usually see in tutorials: you pick your frames, freeze them with FrameHolds, combine them into a dataset using an AppendClip, and then duplicate that whole setup on the right side. Next, you tweak the left side, crop it, strip out any unnecessary channels, and feed it all into CopyCat. It usually looks something like this:

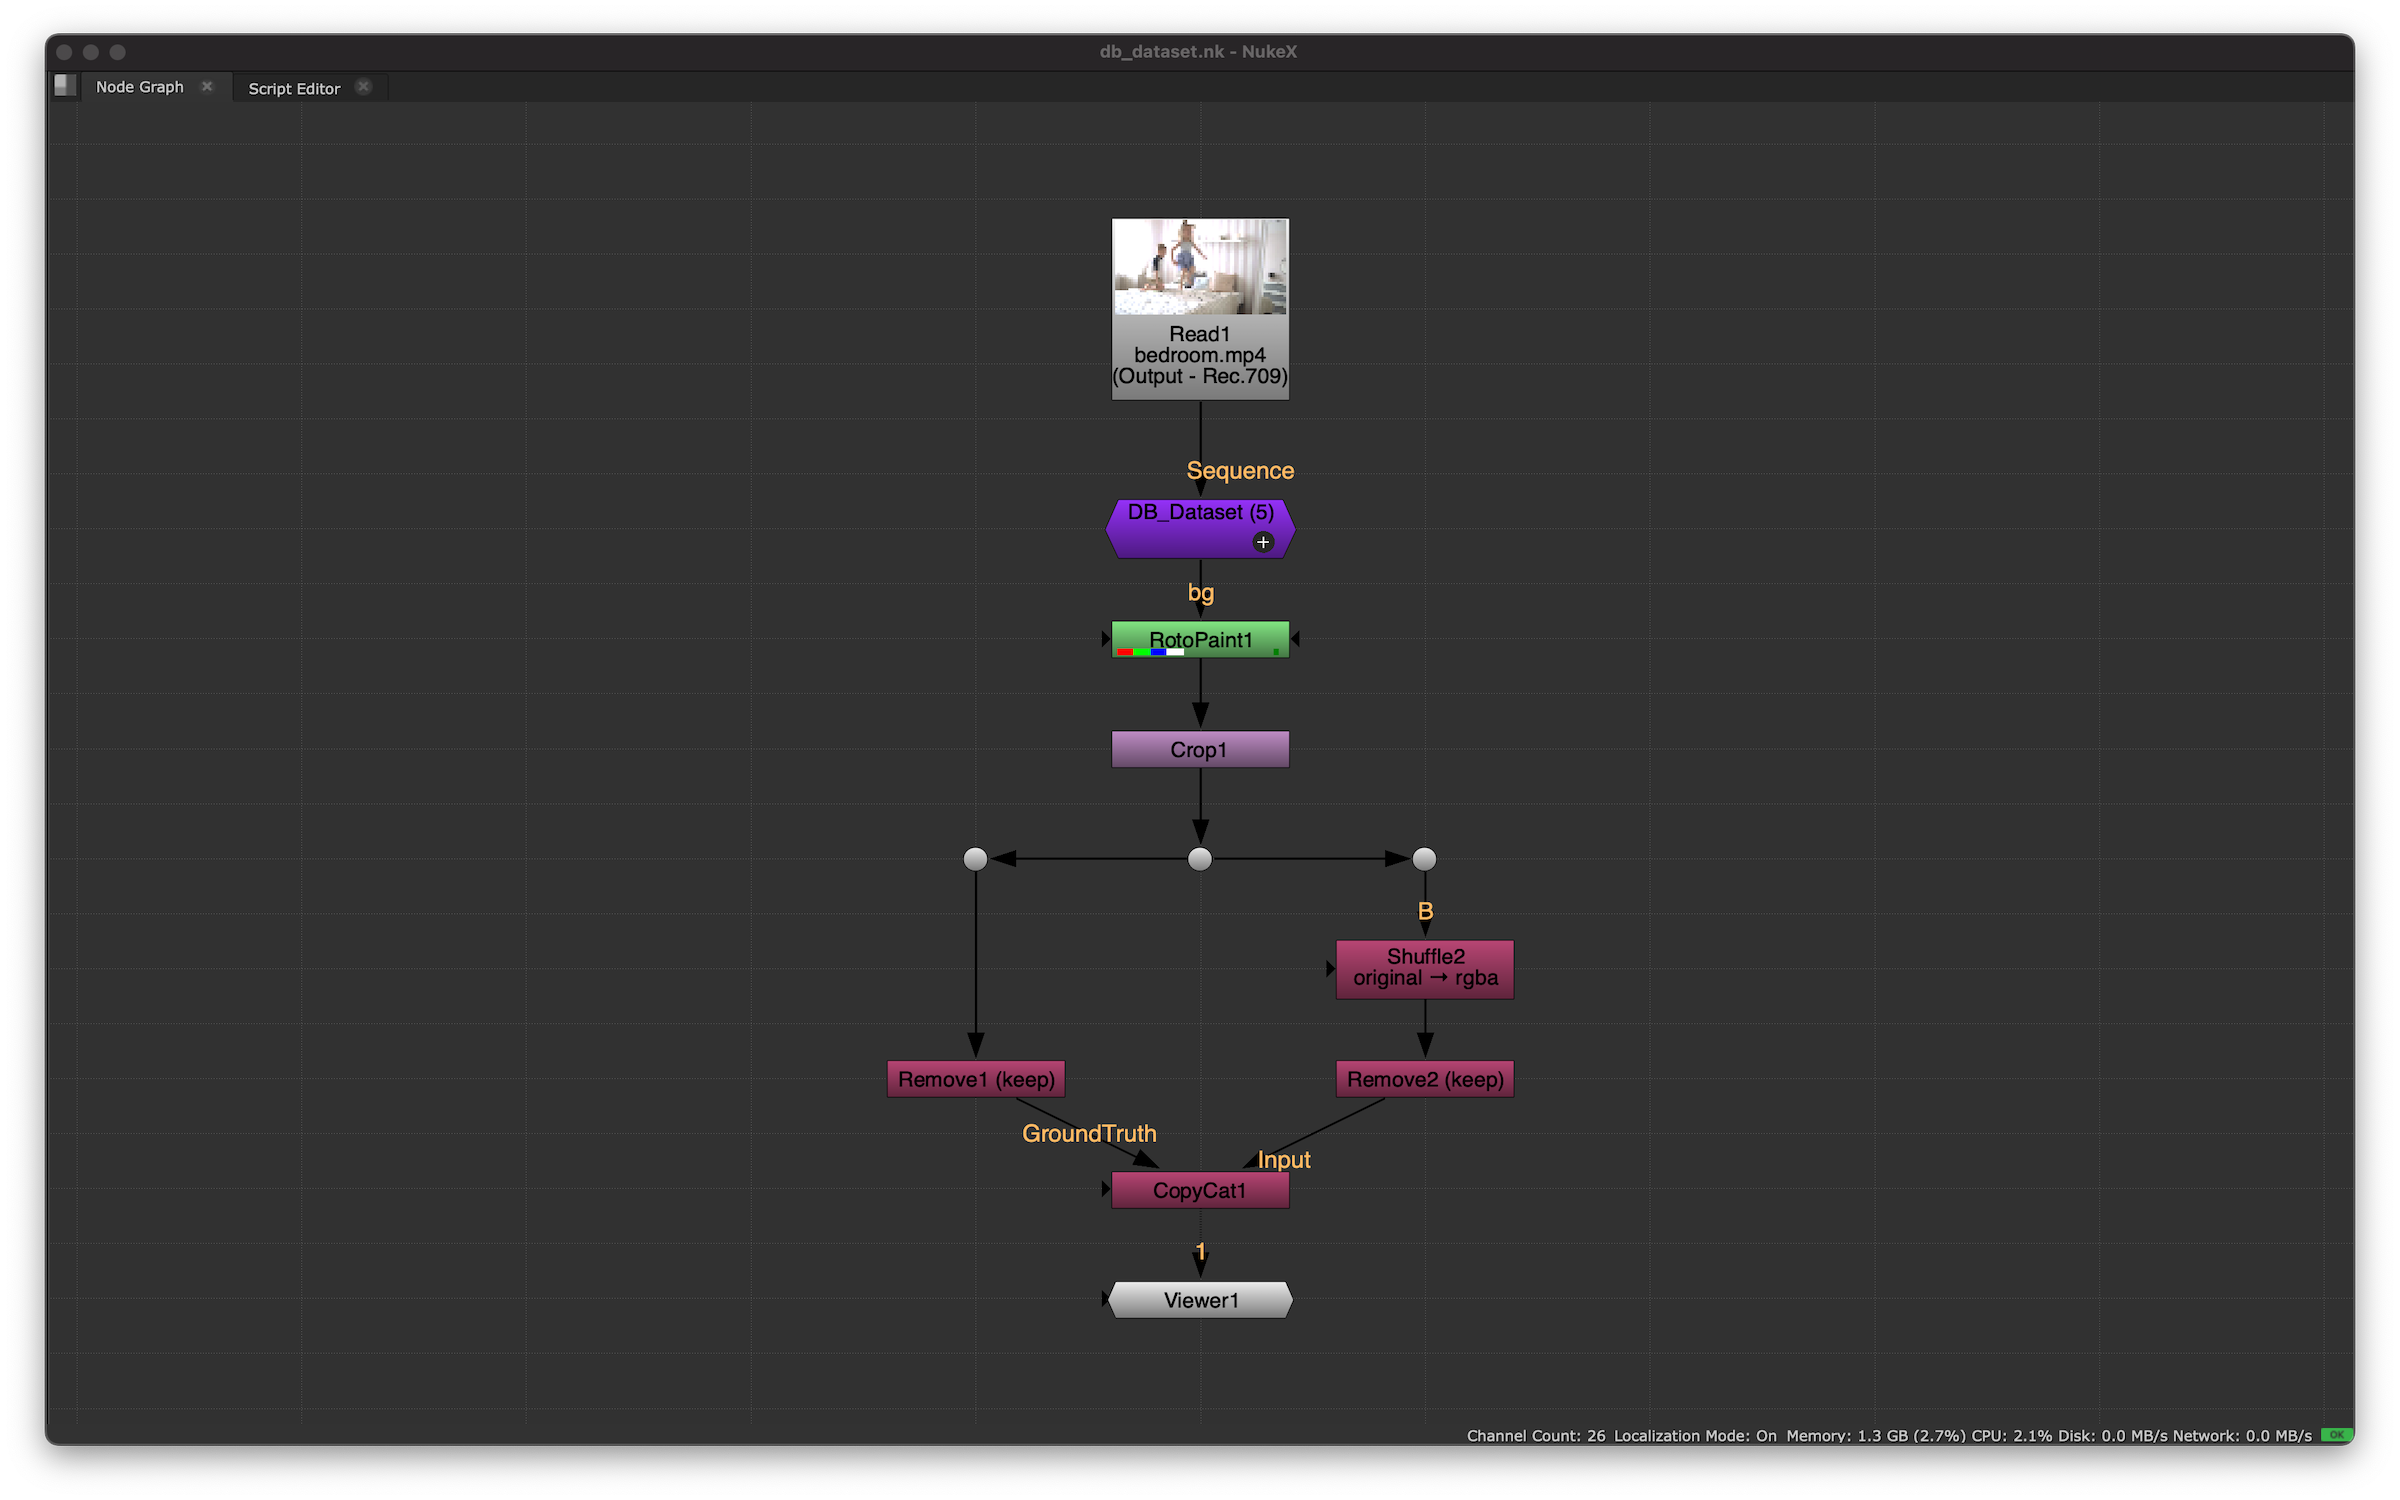
These massive node “fans” are incredibly clunky. They force you into a bunch of redundant steps that distract you from what actually matters: carefully selecting your frames. I needed a tool to get rid of this mess and make life easier. After finding nothing useful on Nukepedia, I decided to build my own — with blackjack and hookers.

The idea is simple: you select the frames you need with a button click, and they instantly assemble into a dataset on the fly. Being able to remove frames one by one or clear them all at once on the fly was a must, too. Here is what I came up with.

The “Add” button sets a keyframe on the selected frame, “Remove” deletes the key from the current frame, and “Reset” wipes all keyframes. Under the hood, these keyframed frames are compiled into a brand new sequence that gets spit out at the end. Right next to the gizmo’s name, there is a counter showing the total number of selected frames. The checkbox below lets you preserve the original image into a separate layer.

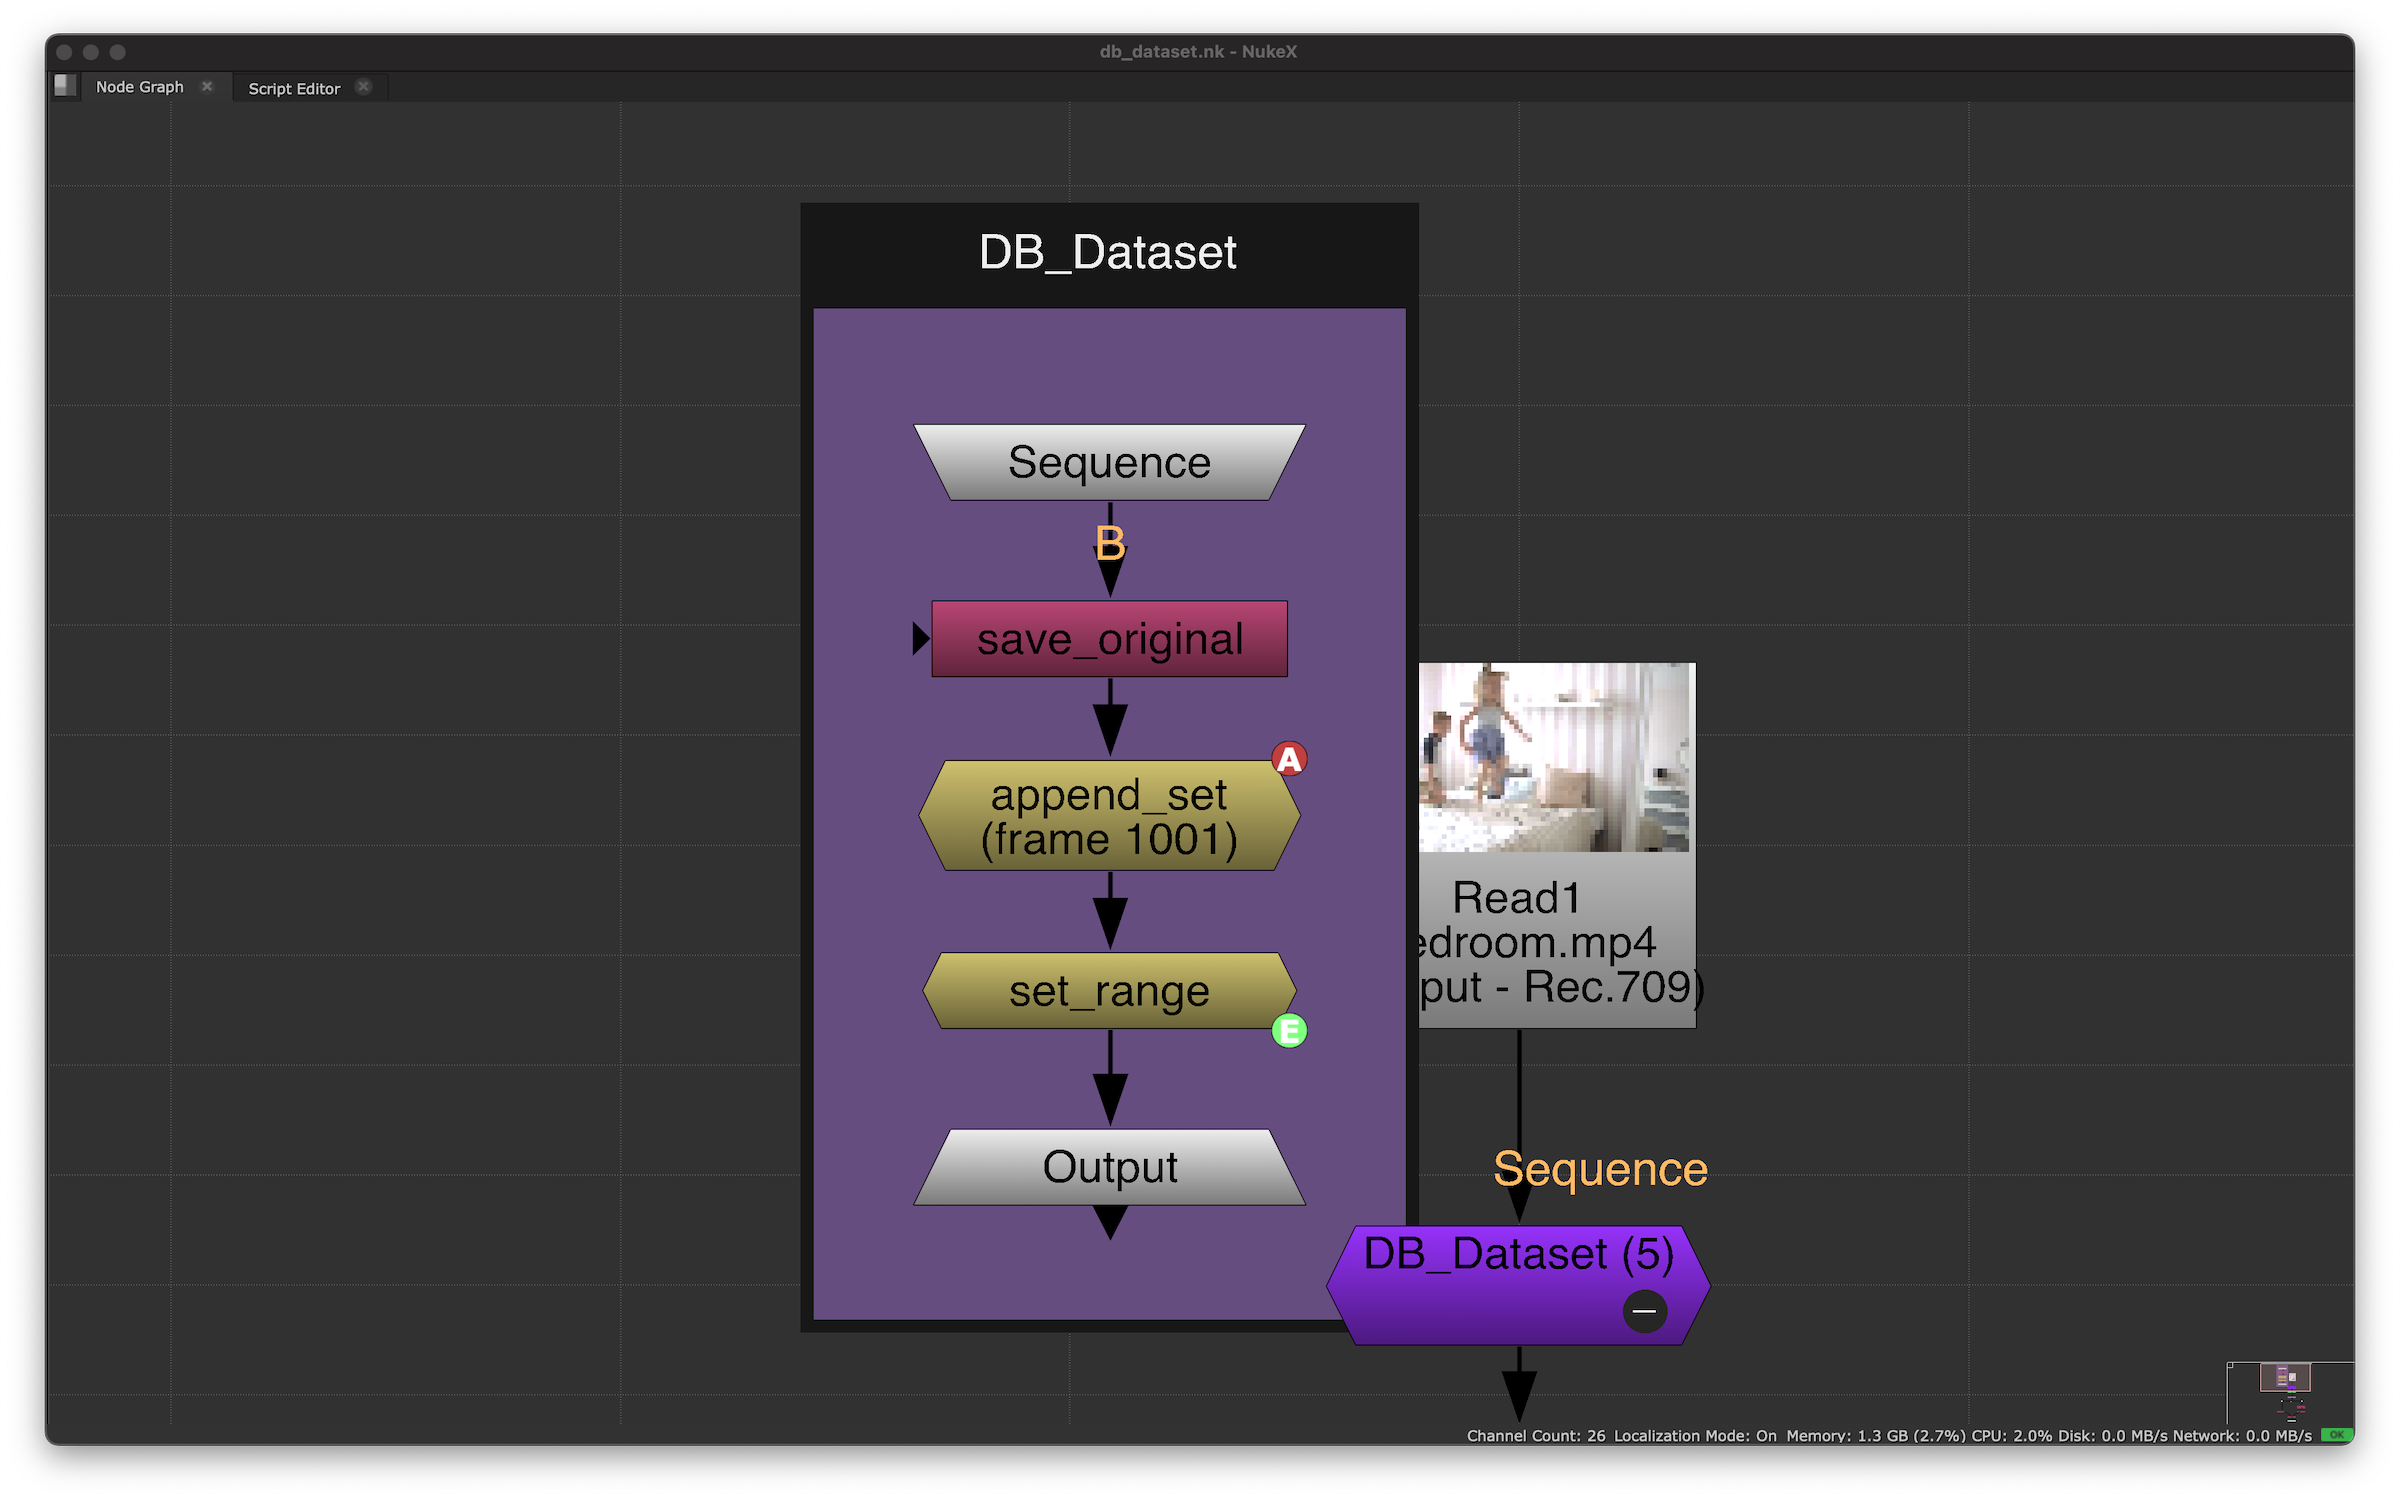
The group turned out to be quite compact with a minimal internal node graph, since the heavy lifting is handled by Python scripts inside the buttons. The first node is a Shuffle named save_original, which preserves the source image and gets muted via the checkbox when not needed. Then, using animation curves, the new sequence is assembled on a FrameHold named append_set, and finally capped off with a FrameRange named set_range. The starting frame number is pulled directly from the project settings.

Download the gizmo from my GitHub.

Earlier Ctrl + ↓